
What To Do If Your Water Heater Leaks On Thanksgiving
Thanksgiving puts more demand on a water heater than almost any other day of the year. Guests take back to back showers, the dishwasher runs several cycles, and the kitchen sink stays busy from early morning until the last roasting pan is scrubbed clean. That heavy load has a way of exposing weak spots in a tank that seemed perfectly fine the week before. A puddle under the unit, a hiss coming from the relief valve, or a damp spot spreading across the garage floor can turn a holiday into an emergency in a matter of minutes. The good news is that most holiday leaks trace back to a short list of causes, and the first few actions you take will matter far more than the tools you happen to own. This guide walks through exactly what to do when your water heater leaks on Thanksgiving, starting with stopping the flow, moving through protecting your floors, and finishing with how to tell when a tank has reached the end of its life. Homeowners across Phelan, Hesperia, Victorville, and the rest of the High Desert deal with this every November, and the correct response looks the same in every one of those homes.
Emergency Steps To Take When A Water Heater Leaks On Thanksgiving
The first ten minutes of a water heater leak will decide how much damage you end up cleaning later. Water that keeps flowing finds drywall, baseboards, and subfloor long before it finds a floor drain, and it travels along framing in directions that make very little sense until you open a wall. Your goal is straightforward: stop the incoming supply, cut the energy source, and move the standing water somewhere harmless. None of that requires plumbing experience, and all of it can be handled with a garden hose, a stack of towels, and a flashlight. Do these steps in the order given, because shutting off the water without also killing the burner or the electric elements can create a far more expensive problem than the original leak. Once the situation is stable and nothing is getting worse, you can call for help without the clock running against you.
How To Shut Off The Water When A Water Heater Leaks On Thanksgiving
Start at the top of the tank, where you will find a cold water inlet valve sitting on the pipe that feeds the heater, almost always on the right side as you face the unit. That valve will either be a lever style ball valve that closes with a quarter turn, or a round handle gate valve that needs several full turns clockwise before it seats. Turning that single valve stops fresh water from entering the tank, which means the leak can only release what is already inside rather than refilling itself indefinitely. Give it a moment after closing, then watch the puddle closely to see if the flow slows down, because a leak that continues at full force usually points to a problem on the hot side of the system rather than the tank itself. Older gate valves in this area often seize from mineral scale and refuse to close completely, so do not force a corroded handle to the point of snapping the stem. If the valve turns but water keeps arriving, move immediately to the main shutoff for the entire house.
The main shutoff on a home connected to city water is generally located where the supply line enters the structure, frequently near the front hose bib, inside a garage wall, or down in the meter box at the curb. A meter box shutoff requires a meter key, and a large adjustable wrench will usually work in a pinch when the holiday hardware store is closed. Plenty of properties around Phelan and Pinon Hills run on private wells instead, and on those systems the fastest way to stop the flow is to switch off the breaker feeding the well pump and then close the valve at the pressure tank. Label that breaker now, before you ever need it, because hunting through an unmarked panel with water spreading across the floor is a miserable way to spend a holiday morning. Once the main is closed, open a bathtub spout on the lowest level of the house to bleed off the remaining pressure sitting in the pipes. That single step relieves the system and noticeably slows any leak that is still weeping from a fitting or a seam.
After the supply is shut down, resist the urge to open every valve on the tank to see what happens. Opening the drain valve at the bottom without a hose attached will dump forty or fifty gallons of scalding water onto the floor in under two minutes, and water heated to 120 degrees causes serious burns in seconds. Instead, thread a standard garden hose onto the drain valve and run the other end out to the driveway, a gravel bed, or any spot well away from the foundation and the septic field. Open a hot water faucet somewhere in the house to break the vacuum, then crack the drain valve slowly and let the tank empty at a controlled pace. Draining the tank takes pressure off the leaking area and gives you room to work, and it also keeps the load off a floor that may already be saturated. Keep an eye on the hose the entire time, since sediment from years of hard water tends to clog the valve opening partway through the process.
How To Shut Off Gas Or Power When A Water Heater Leaks On Thanksgiving
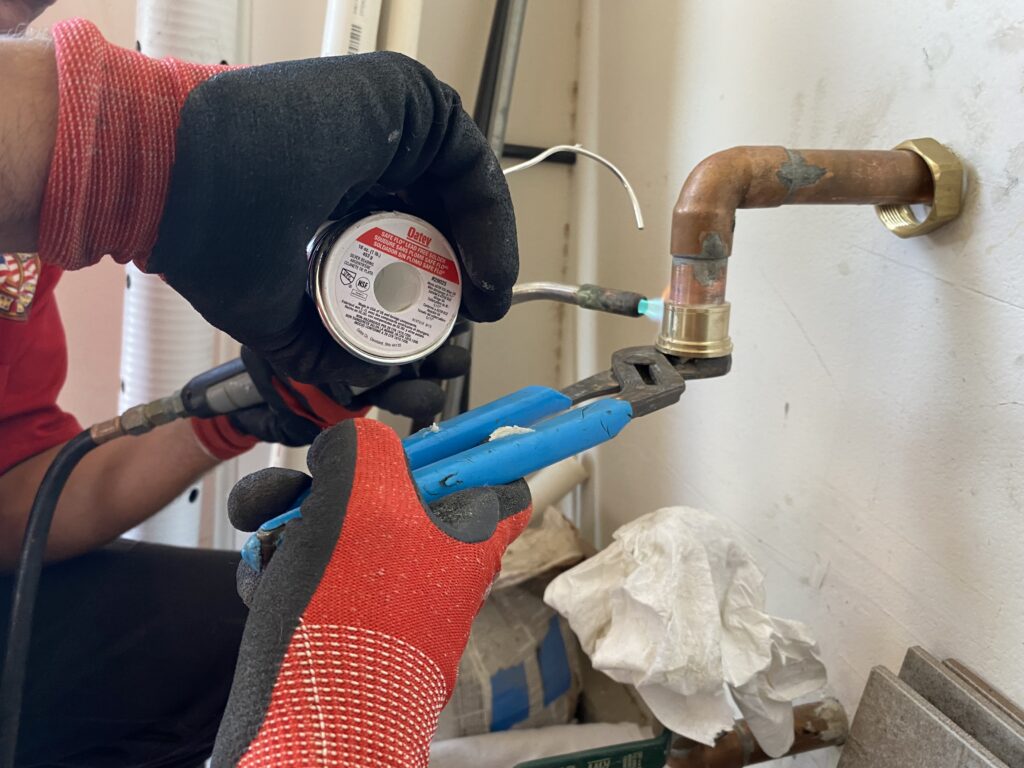
A gas water heater carries a control valve mounted on the front of the tank, near the bottom, with a dial marked for pilot, on, and off settings. Turn that dial to the off position before you drain anything, because a burner that fires inside an empty or partially empty tank will warp the flue and damage the glass lining beyond repair. Above that control you will also find a yellow handled shutoff on the flexible gas line, and the handle sits parallel to the pipe when the gas is flowing and perpendicular when it is closed. Close that handle as well for any leak large enough to have reached the burner compartment, because water sitting around a pilot assembly creates a hazard nobody wants to manage on a holiday. If you smell gas at any point, skip every other step, get everyone out of the house, and call the gas utility from outside rather than from a phone inside the building. Never relight a pilot on a unit that has been sitting in standing water, since the gas control and the thermocouple both need inspection before that unit is safe to operate again.
An electric water heater needs the same caution applied at the breaker panel instead of the gas line. Find the double pole breaker, typically rated at 30 amps, and switch it fully to the off position before you touch the drain valve or the access panels. Electric heating elements depend on being submerged to shed heat, and an element energized in an empty tank will burn out within seconds and often crack the surrounding gasket in the process. Replacing a pair of burned elements adds unnecessary cost to a repair that might otherwise have been simple, and it is entirely avoidable with one flip of a breaker. Do not attempt to reach the panel by walking through standing water that touches outlets, appliance cords, or the base of a furnace. When water and electricity meet in the same room, the safe move is to shut off the main breaker from a dry location or to wait for a professional to arrive.
Once the energy source is off, the tank becomes a much more predictable thing to work around and the situation stops escalating on its own. Hot water already stored inside will stay warm for hours, which means you can still fill a pot or two for the kitchen if you catch the problem early enough. Write down the brand, the model number, the serial number, and the capacity printed on the data plate, because a plumber can identify the correct replacement parts far faster with that information in hand. Take a few photos of the leak location and the surrounding area with your phone, since those images help enormously with insurance claims and with diagnosing the cause after the area has been dried. Note the approximate age of the unit as well, as the first four digits of most serial numbers encode the month and year of manufacture. Dealing with a leaking tank right now? Click here for our water heater repair service and get a licensed plumber headed your way.
How To Contain The Water When A Water Heater Leaks On Thanksgiving
Containment starts with getting the standing water moving toward a place it can do no harm, and a wet vacuum handles that job far better than a mop and bucket ever will. Work outward from the tank in a spiral, pulling water away from walls and doorways first, because those transition points are where moisture climbs into drywall and door casings. Old towels stacked into a dam along the edge of a garage step or a hallway threshold will buy you several minutes to work, and rolled bath mats do the same job when towels run short. Move cardboard boxes, holiday decorations, and anything stored on the floor to a dry surface immediately, since cardboard wicks water upward at a surprising speed and ruins everything inside. Pay close attention to interior walls that back up to the heater closet, tapping the drywall low to the ground to check for the soft feel of saturation. Any wall that feels spongy needs a fan on it right away, and it may need a small inspection cut later.
Airflow does most of the drying work, so open the garage door, set up box fans, and point them at the wet area from two different angles for the best results. A dehumidifier running in a closed room pulls moisture out of the air far more effectively than fans alone, and the two together shorten the drying window considerably. Cold November nights in the High Desert drop humidity outdoors, which actually works in your favor for ventilation during daylight hours. Pull back the edge of any carpet that got wet and lift the padding, because padding holds water like a sponge and rarely dries in place before mold begins to establish itself. Baseboards can be pried loose gently with a putty knife to let air reach the bottom plate of the wall, and they usually go back on without needing replacement. Give the whole area at least 48 hours of steady airflow before you decide the drying is finished.
Once the immediate mess is under control, take a careful look at where the water actually originated rather than where it pooled. Water follows the slope of the floor, so a puddle at the front of a garage might come from a fitting at the very back of the tank. Dry the top of the heater completely, dry the connections, dry the base pan, and then wait twenty minutes to see which surface goes wet again first. That simple test tells a plumber more than any description over the phone, and it separates a fitting leak from a failed tank in a matter of minutes. Check the drain pan under the unit if one is installed, and confirm that its drain line is clear rather than plugged with dust and rust flakes. A pan that overflows because its outlet is blocked turns a slow drip into a flooded room while everyone is busy in the kitchen.
Common Reasons A Water Heater Leaks On Thanksgiving
Water heaters rarely fail without warning; they fail when demand finally exceeds what a worn component can handle. Thanksgiving delivers exactly that kind of demand, with the tank cycling on and off far more often than it does on a normal Thursday. Every heating cycle expands the steel shell slightly and then lets it contract again, and that constant movement stresses every seam, thread, and gasket in the system. Hard water throughout the High Desert compounds the issue by leaving mineral scale on the tank bottom and inside the fittings. Understanding the usual suspects helps you describe the problem accurately and helps you avoid paying for the wrong repair. Nearly every holiday leak we see falls into one of three categories, and each one carries a very different price tag.
Why The Temperature And Pressure Relief Valve Makes A Water Heater Leak On Thanksgiving
The temperature and pressure relief valve, mounted on the top or upper side of the tank, exists as a safety device that opens automatically when the water reaches roughly 210 degrees Fahrenheit or when internal pressure climbs to about 150 psi. A discharge tube runs from that valve down to within six inches of the floor, and finding water at the bottom of that tube means the valve did precisely what it was designed to do. On Thanksgiving the tank runs harder than usual, temperatures climb, and thermal expansion pushes pressure upward with every recovery cycle. That combination causes valves to weep or to release outright, leaving a puddle that looks alarming but often signals a pressure problem rather than a failed tank. Never cap, plug, or thread anything onto the end of that discharge tube, because blocking the only relief path on a pressurized vessel creates genuine danger. A valve that releases repeatedly needs a diagnosis, not a plug.
Thermal expansion causes most of these releases, and it happens because heated water occupies more volume than cold water does. In an open system the extra volume simply pushes back into the city main, but a pressure regulator or a check valve on the incoming line creates a closed system where that expansion has nowhere to go. Pressure then spikes every time the burner fires, and the relief valve becomes the weakest point in the loop. A properly sized thermal expansion tank solves the problem by giving that expanded water a cushion of compressed air to push against. The air charge inside that tank should be set to match the static water pressure of the home, commonly somewhere between 50 and 60 psi. Expansion tanks lose their charge over time and fail quietly, which is why a unit installed eight years ago may no longer be doing anything at all.
High incoming water pressure produces the same symptom through a different path, and plumbing code generally requires household pressure to stay below 80 psi for good reason. Pressure above that threshold shortens the life of every fixture in the house, from faucet cartridges to washing machine hoses to the water heater itself. A simple gauge threaded onto an outside hose bib gives a reading in under a minute and costs less than a bag of potatoes. Readings that swing dramatically between morning and evening usually point to a failing pressure reducing valve at the service entrance. Correcting the pressure often stops relief valve discharge completely, with no work required on the tank at all. Want to stop pressure problems before they empty your tank? Click here for our water heater expansion tank service.

Why Loose Fittings And Connections Make A Water Heater Leak On Thanksgiving
The cold inlet and hot outlet connections on top of the tank take constant abuse from expansion, contraction, and vibration, and threaded joints slowly loosen under that cycling over a period of years. Flexible connectors, which many homes use in place of rigid copper, contain a rubber gasket at each end that hardens and shrinks with age until it can no longer hold a seal. A drip from one of these connections often runs down the outside of the tank and collects at the base, which fools people into believing the tank itself has rotted through. Drying the top of the unit and watching which fitting rewets first settles that question quickly. Repairs at this level are inexpensive, usually involving a new connector, fresh thread sealant, and twenty minutes of labor. Catching a connection leak early is the difference between a minor service call and a full replacement.
Galvanic corrosion causes another common version of this failure, and it develops where copper piping meets the steel nipples threaded into the top of the tank. Two dissimilar metals in contact with conductive water form a small electrical cell, and one of those metals slowly gives up material to the other. Dielectric unions or nipples with a plastic lining are meant to break that connection, but they clog with scale and corrode internally after roughly a decade of service. The resulting leak often starts as a green or white crust around the fitting long before any water becomes visible on the floor. Mineral rich water in this region speeds that process along considerably compared to areas with softer supply. Any crusty buildup around the top connections deserves attention during the next service visit rather than after it starts dripping.
The drain valve at the bottom of the tank ranks as the third frequent offender, particularly the inexpensive plastic versions installed on many builder grade units. Plastic valve bodies become brittle with heat cycling, and the internal seat wears until it holds only partially closed. Sediment lodged in the valve seat causes a slow weep that runs down the side of the tank and pools underneath, presenting exactly like a failed shell. Replacing a drain valve is straightforward work for a plumber and inexpensive compared to a new heater. Upgrading to a full port brass ball valve at the same time makes future flushing far easier and far more effective. Homes with heavy sediment benefit noticeably from that upgrade, since a plastic valve often clogs the moment you try to flush the tank.
Why Tank Corrosion Makes A Water Heater Leak On Thanksgiving
The tank inside a standard water heater is welded steel coated with a thin layer of glass lining, and that lining takes the full brunt of hot, mineral heavy water for the entire life of the unit. Small imperfections in the coating expose bare steel, and corrosion begins at those points the day the heater is first filled. A sacrificial anode rod, made of magnesium or aluminum, protects those exposed spots by corroding preferentially instead of the tank walls. That rod depletes over time and typically needs replacement every three to five years in areas with hard water, though the vast majority of homeowners never touch it. Once the anode is consumed, the tank starts corroding in earnest, and the countdown to failure begins. A leak originating from the shell of the tank cannot be repaired, patched, or sealed by any legitimate method.
Sediment accumulation accelerates the same process from the bottom up, and it develops as dissolved minerals fall out of suspension and settle into a hardened layer on the tank floor. That layer insulates the water from a gas burner below, forcing the burner to run longer and driving the steel to much higher temperatures than the design intends. Overheated steel loses its protective lining faster, and the familiar popping or rumbling sound during a heating cycle is steam escaping from beneath the sediment bed. Electric models suffer differently, with sediment burying the lower element until it overheats and burns out. Annual flushing removes most of that material and adds years of useful service to the unit. Tanks that have never been flushed in a decade of use frequently hold several inches of hardened scale.
Age remains the single best predictor of a tank failure, and a conventional tank style water heater generally delivers eight to twelve years of service before the shell gives up. Units past that mark that start leaking from the bottom are finished, and no amount of tightening or sealing will change the outcome. Replacing a heater on your own schedule costs dramatically less than replacing one on Thanksgiving after it has soaked a hallway. Check the serial number on the data plate to determine the manufacture date, since most manufacturers encode the year and month in the first four characters. Anything approaching a decade of service should be evaluated well before the holidays arrive rather than during them. Ready to replace an aging tank before it fails? Click here for our water heater installation service.
Why You Need A Licensed Plumber When A Water Heater Leaks On Thanksgiving
Shutting off the water and draining the tank stabilizes the situation, but it does not answer the question of what failed or what comes next. A licensed plumber identifies the source, confirms the condition of the tank, checks the pressure across the system, and tells you honestly which repairs make financial sense. Gas connections, venting, seismic strapping, and expansion control all fall under code requirements that carry real safety consequences when handled incorrectly. Rescue Plumbers Inc answers calls from Phelan, Hesperia, Victorville, Apple Valley, Oak Hills, and the surrounding communities throughout the holiday season. Our estimates are free, they carry no obligation, and our technicians earn no commission on what they recommend.
Repair Or Replacement After A Water Heater Leaks On Thanksgiving
Not every leak means a new water heater, and a fair evaluation starts with locating the exact origin of the water. Fittings, relief valves, drain valves, and supply connectors are all repairable components with modest parts costs and short labor times. A tank that has rusted through anywhere along its shell or bottom seam is a different situation entirely, since the failure is structural and permanent. We show you what we find and explain the reasoning rather than delivering a verdict and waiting for a signature. That approach lets you weigh the cost of a repair against the remaining service life of the unit with real information in hand.
Age and repair history carry heavy weight in that decision, and a nine year old tank needing a second significant repair rarely justifies the investment. Newer units with a single failed component almost always deserve repair instead of replacement. We also look at sizing, because a household that regularly runs out of hot water during holidays may be better served by a larger tank or a tankless system. Recovery rate matters as much as capacity for homes that host frequently throughout the year. Getting the sizing right the first time prevents the same frustration from returning next November.
Installation quality determines how long the replacement will last, and it involves considerably more than setting a new tank in the old spot. Proper venting, correct gas line sizing, a code compliant relief discharge line, seismic strapping, a functioning expansion tank, and a drain pan with a working outlet all belong in a complete job. Skipping any of those items saves money on the invoice and costs far more later. We install to code because code exists to keep gas appliances safe inside occupied homes. Not sure where a leak is coming from? Click here for our leak detection service and we will trace it precisely.
How To Prevent A Water Heater Leak Before The Next Thanksgiving
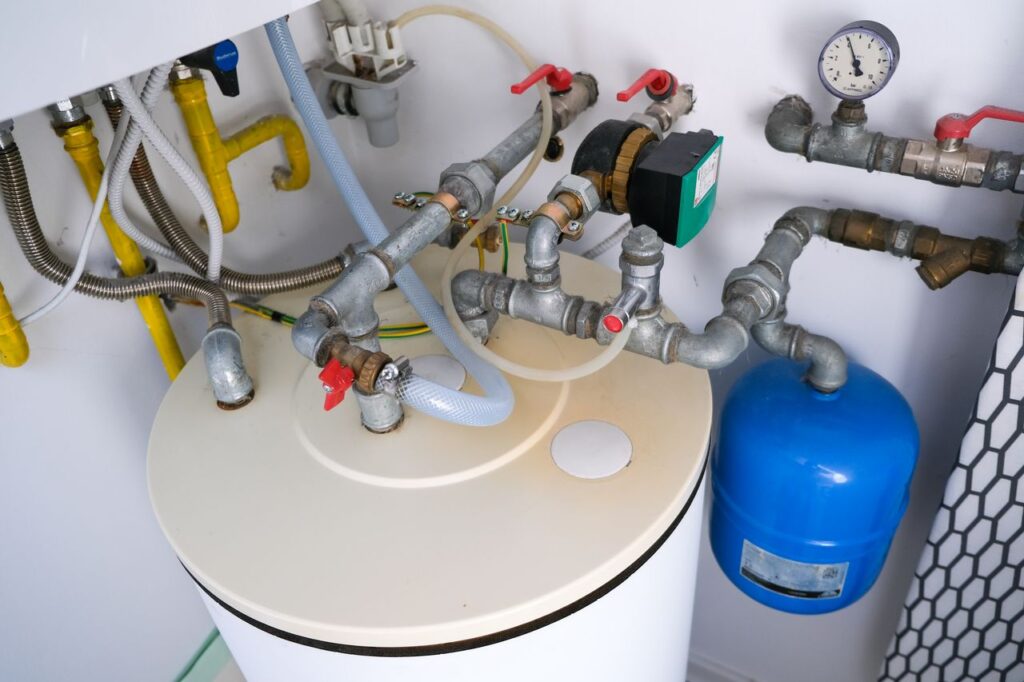
Yearly maintenance prevents the majority of the holiday emergencies we respond to every November and December. Flushing the tank clears sediment before it insulates the burner surface and drives the steel to damaging temperatures. Testing the relief valve confirms that the safety device still operates and still seats properly afterward. Inspecting the anode rod reveals how much protection the tank has left, often years before any leak develops. These tasks take under an hour when scheduled and take considerably longer when performed under pressure.
Timing that service in early fall gives you room to address anything the inspection uncovers. September and October are ideal, since parts remain readily available and schedules stay open across the High Desert. Discovering a failing expansion tank in October costs a fraction of discovering it through a flooded garage in November. Small corrections made early prevent large expenses made late. A short annual appointment consistently returns more value than any other plumbing service we offer.
Simple habits between service visits help as well and cost nothing to adopt. Keep the area around the heater clear of stored boxes so leaks stay visible instead of hidden. Glance at the base of the tank once a month with a flashlight and look for rust staining or moisture. Listen for popping or rumbling during a heating cycle, since that sound reliably indicates sediment buildup. Report changes early and the fix stays small. Want an inspection before the holidays arrive? Click here for our water heater inspection service.
Why Choose Rescue Plumbers Inc When Your Water Heater Leaks On Thanksgiving
Rescue Plumbers Inc is a family owned and operated company with 15 years of experience serving the High Desert. We are licensed and insured, and our technicians work on a non commission basis, which means nobody in our organization earns more by selling you a heater you do not need. Our estimates are free and carry no obligation whatsoever. You reach an actual person on the phone instead of a call center reading from a script. That real human connection matters most on a day when your kitchen is full of guests and your garage floor is full of water.
Being truly local changes response times in a meaningful way, since we live in the same communities we serve. We know the water chemistry in Phelan, we know the well systems in Pinon Hills, and we know which neighborhoods in Victorville and Apple Valley run pressure high enough to shorten equipment life. That familiarity produces faster diagnoses and more accurate recommendations. We arrive with the parts that commonly fail on the units installed throughout this region. Local knowledge saves time, and time saves floors.
Reach us at (760) 241-3100 or send a message to fixit@rescueplumbersinc.com, and our shop sits at 6083 Lindero Rd in Phelan. We handle water heater repair, replacement, expansion tanks, and full system inspections across the entire High Desert. Call the moment you see water rather than waiting to see how bad it gets. A leaking tank never improves on its own, and every hour of delay adds to the cleanup. We will get your hot water back and get your holiday back on track.